Warning:Attempt to Present <Modal View Controller: 0x7561600> on <ViewController: 0x75a72e0 > while a presentation is in progress!
and the modal view does not appear.
Here the issue is happening because, we are first dismissing the UIImagePicker and immediately we are displaying another view as modal view. That's why we are getting this error.
So, the solution is the method with the completion handler.
In my application i shared the video on googlePlus using Google+ API and i need to get the comments of that video. Is it possible to get the comments of video from googlePlus. I gone through the GooglePlus API documentation and i found one link (https://www.googleapis.com/plus/v1/activities/activityId/comments) to get the comments. but in that link we need t place the activityId. When we share the video on googlePlus then one activityId is generated for that video but iam unable to get that activityId.
In this link they are using "activityid" to get the comments of respective videos.We are unable to get the activity id .Can you please tell me the suggetions or any links
In my application i shared the video on googlePlus using Google+ API and i need to get the comments of that video.
Is it possible to get the comments of video from googlePlus.
I gone through the GooglePlus API documentation and i found one link (https://www.googleapis.com/plus/v1/activities/activityId/comments)
to get the comments.
but in that link we need t place the activityId. When we share the video on googlePlus then one activityId is generated for that video but iam unable to get that activityId.
Blocks capture the state of the variables declared inside, so we must
declare that the variable is mutable. And mutability is exactly what
you need considering that you're essentially setting this thing.
Change UITextField’s placeholder color without subclassing it
The safe way to customize UITextField’s placeholder is subclassing theUITextField and overriding placeholderRectForBounds:, Apple won’t bother you on this one. However, if you want to take the risk, you can try this way:
From time to time, Apple adds deprecation macros to APIs to indicate that those APIs should no longer be used in active development. When a deprecation occurs, it is not an immediate end-of-life to the specified API. Instead, it is the beginning of a grace period for transitioning off that API and onto newer and more modern replacements. Deprecated APIs typically remain present and usable in the system for a reasonable amount of time past the release in which they were deprecated. However, active development on them ceases and the APIs receive only minor changes—to accommodate security patches or to fix other critical bugs. Deprecated APIs may be removed entirely from a future version of the operating system.
As a developer, it is important that you avoid using deprecated APIs in your code as soon as possible. At a minimum, new code you write should never use deprecated APIs. And if you have existing code that uses deprecated APIs, update that code as soon as possible. Fortunately, the compiler generates warnings whenever it spots the use of a deprecated API in your code, and you can use those warnings to track down and remove all references to those APIs.
This release includes deprecations in the following technology areas:
The Map Kit framework includes deprecations for the MKOverlayView class and its various subclasses. The existing overlay views have been replaced with an updated set of overlay renderer objects that descend from the MKOverlayRenderer class. For more information about the classes of this framework, see Map Kit Framework Reference.
The Audio Session API in the Audio Toolbox framework is deprecated. Apps should use the AVAudioSession class in the AV Foundation framework instead.
The CLRegion class in the Core Location framework is replaced by the CLCircularRegion class. The CLRegion class continues to exist as an abstract base class that supports both geographic and beacon regions.
The UUID property of the CBCentral class is deprecated. To specify the unique ID of your central objects, use the identifier property instead.
The Game Kit framework contains assorted deprecations intended to clean up the existing API and provide better support for new features.
The UIKit framework contains the following deprecations:
The wantsFullScreenLayout property of UIViewController is deprecated. In iOS 7 and later, view controllers always support full screen layout.
UIColor objects that provided background textures for earlier versions of iOS are gone.
Many drawing additions to the NSString class are deprecated in favor of newer variants.
The gethostuuid function in the libsyscall library is deprecated.
In iOS 7 and later, if you ask for the MAC address of an iOS device, the system returns the value 02:00:00:00:00:00. If you need to identify the device, use the identifierForVendorproperty of UIDevice instead. (Apps that need an identifier for their own advertising purposes should consider using the advertisingIdentifier property of ASIdentifierManagerinstead.)
Added frameworks:
GameController
JavaScriptCore
MediaAccessibility
MultipeerConnectivity
SafariServices
SpriteKit
Wednesday, 25 September 2013
iOS 7 Design Resources
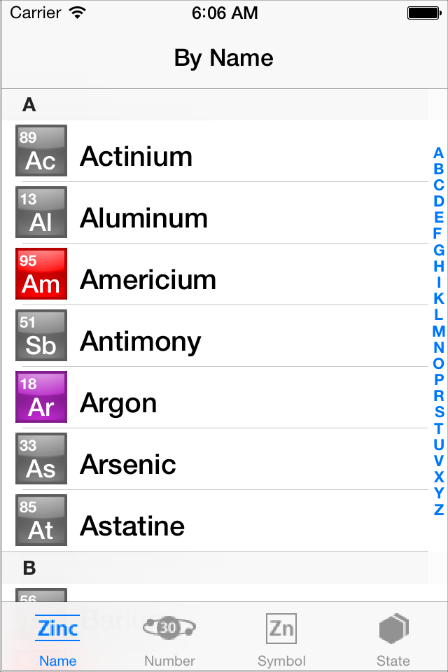
iOS 7 introduces many UI changes, such as borderless buttons, translucent bars, and full-screen layout for view controllers. Using Xcode 5, you can build a project for iOS 7 and run it in iOS 7 Simulator to get a first glimpse of the way the app looks with iOS 7 UI.
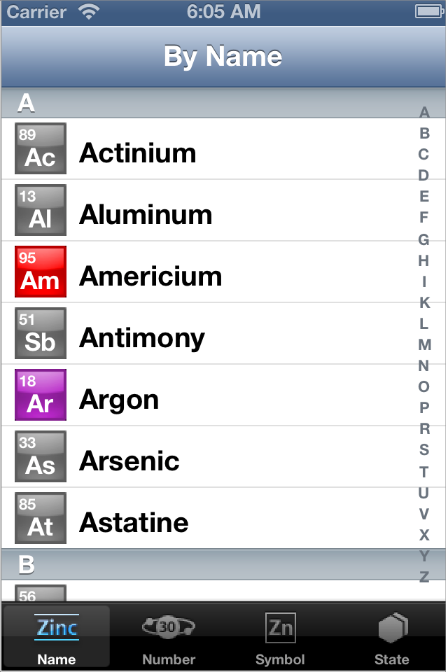
For example, the only differences between the two versions of TheElements sample project shown below are the deployment target and the simulator.
TheElements sample app in iOS 7 Simulator
TheElements sample app in iOS 6 Simulator
It’s tempting to dive straight into the work of updating your app, but there are a few things to think about before beginning the process.
As you interact with the built-in apps, it becomes clear that the changes in iOS 7 are both subtle and profound. Familiar UI elements are easily recognizable but look very different. Visual touches of physicality and realism are muted and refined, while realism in motion is enhanced.
Scoping the Project
Knowing your app’s compatibility requirements and customization characteristics gives you some idea of the path to take. Use the following checklists to fill in more details and to scope the project.
Things Every App Must Do
Update the app icon.
In iOS 7, app icons for high-resolution iPhone and iPod touch are 120 x 120 pixels; for high-resolution iPad, app icons are 152 x 152 pixels. (To learn more about all icon sizes, see “Icon and Image Sizes”.)
Note that iOS 7 doesn’t apply shine or a drop shadow to the app icon. And, although iOS 7 still applies a mask that rounds the corners of an app icon, it uses a different corner radius than earlier versions of iOS.
Update the launch image to include the status bar area if it doesn’t already do so.
Support Retina display and iPhone 5 in all your artwork and designs, if you’re not already doing so.
Redesign custom bar button icons. In iOS 7, bar button icons are lighter in weight and have a different style. For some design guidance, see “Bar Button Icons”.
Prepare for borderless buttons by reassessing the utility of button background images and bezels in your layout.
Examine your app for hard-coded UI values—such as sizes and positions—and replace them with those you derive dynamically from system-provided values. Use Auto Layout to help your app respond when layout changes are required. (If you’re new to Auto Layout, learn about it by readingAuto Layout Guide.)
Examine your app for places where the metrics and style changes of UIKit controls and views affect the layout and appearance. For example, switches are wider, grouped tables are no longer inset, and progress views are thinner. For more information on specific UI elements, see Bars and Bar Buttons,Content Views, Controls, and Temporary Views.
Adopt Dynamic Type. In iOS 7, users can adjust the text size they see in apps. When you adopt Dynamic Type, you get text that responds appropriately to user-specified size changes. For more information, see Using Fonts.
Expect users to swipe up from the bottom of the screen to reveal Control Center. If iOS determines that a touch that begins at the bottom of the screen should reveal Control Center, it doesn’t deliver the gesture to the currently running app. If iOS determines that the touch should not reveal Control Center, the touch may be slightly delayed before it reaches the app.
Revisit the use of drop shadows, gradients, and bezels. Because the iOS 7 aesthetic is smooth and layered—with much less emphasis on using visual effects to make UI elements look physical—you may want to rethink these effects.
If necessary, update your app to best practices for iOS 6—such as Auto Layout and storyboards—and ensure that the app doesn’t use deprecated APIs.
Now that you have a better idea of the types of things you need to do, learn more about changes in view controllers, tinting, and fonts by reading Appearance and Behavior.
Saturday, 31 August 2013
Hi Team,
When Video url is playing in a webview then how can we detect whether the video has been started or not?
If you have any idea please suggest me.
i am using Soap web services to download the data from server. Device is getting flashed like flash light while downloading data. i am using synchrous request to get the data. I could nt find out the reason why its getting flashed. Please help me out, Thanks in advance.
You have worked weeks or months on your first iOS application and you are ready to submit your masterpiece to Apple’s App Store. How do you do this? Is your application ready for submission? I am sure that some of these questions have entered your mind at one point or another. Is submitting an application as simple as sending Apple your application’s binary? Not quite. With this tutorial, I will provide you with a detailed map to get your application submitted to Apple’s App Store.
Introduction
Even though the App Store review process is a black box for the most part, that doesn’t mean that you can’t prepare yourself and your application for Apple’s review process. Apple provides guidelines to help you stay within the sometimes invisible boundaries of what is and isn’t allowed in the App Store.
The first time you submit an application to the App Store is exciting and nerve-racking at the same time. Even for experienced iOS developers, submitting an application to the App Store is often a stressful undertaking because it is something that most developers don’t do on a daily basis.
Throughout this article, I am assuming that you are a registered iOS developer which means that you are enrolled in Apple’s iOS Developer Program and are allowed to submit applications for publication in the App Store. To submit an iOS application to the App Store, you need to be a registered iOS developer. Red flag? Don’t worry. You can enroll in Apple’s iOS Developer Program by visiting this link and clicking the Enroll Now button.
Figure 1: Enrolling in Apple’s iOS Developer Program
1. Is your application ready?
Step 1: Testing
An application isn’t necessarily ready when you’ve written the last line of code or implemented the final feature of the application’s specification. Have you tested your application on one or more physical devices? Have you profiled your application for memory leaks and performance issues? Does your application crash from time to time? The family of iOS devices has grown substantially over the past years and it is important to test your application on as many iOS devices as you can lay your hands on. Common issues include not optimizing an application for the iPhone 5′s 4″ screen or the iPad Mini’s 7.9″ screen.
The iOS Simulator is a great tool, but it runs on your Mac, which has more memory and processing power than the phone in your pocket. I can assure you that the differences in performance between an old(er) iPhone 3GS and an iPhone 5 are like night and day. As an iOS developer, you should never get rid of an old iOS device as long as you build or maintain applications that can run on any of these older devices.
Apple’s Review Process isn’t airtight, but it is very capable of identifying problems that might affect your application’s user experience. If your application crashes from time to time or it becomes slow after ten minutes of use, then you have some work to do before submitting it to the App Store. Even if Apple’s review team doesn’t spot the problem, your users will. If the people using your application are not pleased, they will leave bad reviews on the App Store, which may harm sales or inhibit downloads.
Step 2: Rules and Guidelines
As I mentioned earlier, Apple provides developers with a number of documents that are a great help during the creation and development process of your application. The documents that you should be aware of are the iOS Human Interface Guidelines and the App Store Review Guidelines. Despite the availability of these documents, it seems that few developers take the time to browse them, let alone read them. It shouldn’t be a surprise that some applications are therefore rejected even though the reason for the rejection is clearly stated in these documents.
Even if you don’t intend to read the iOS Human Interface Guidelines or the App Store Review Guidelines, it is important to know about some of the rules that they talk about. Take a look at the short list below to get an idea of what your application should and shouldn’t do.
Your application …
doesn’t crash.
shouldn’t use private API’s.
shouldn’t replicate the functionality of native applications.
should use In App Purchase for in-app (financial) transactions.
shouldn’t use the camera or microphone without the user’s knowledge.
only uses artwork that you have the copyright of or you have permission to use.
Keep in mind that this is a tiny subset of the guidelines included in the aforementioned documents. The majority of the rules and guidelines are trivial, but some are not and you might even violate some of them inadvertently. Let me give you an example. Before Apple started using its own maps, the MapKit framework used Google’s maps. This was clear to the user because of the small Google logo in the bottom left corner of each map. However, if some part of your application’s user interface covered or obscured Google’s logo, your application would get rejected. This rule seems trivial, but it is a rule that is easily violated if you’re not careful. Even automated tests won’t cover you in this case.
2. Prerequisites
Before you can even start thinking about submitting your application to the App Store, you need to make sure that you have an App ID, a valid distribution certificate, and a valid provisioning profile. Let me show you what this entails.
Step 1: App ID
Every application needs an App ID or application identifier. There are two types of application identifiers, (1) an explicit App ID and (2) a wildcard App ID. A wildcard App ID can be used for building and installing multiple applications. Despite the convenience of a wildcard App ID, an explicit App ID is required if your application uses iCloud or makes use of other iOS features, such as Game Center, Apple Push Notifications, or In App Purchase.
If you’re not sure what App ID best fits your project, then I recommend reading Technical Note QA1713 for more information about this topic.
Step 2: Distribution Certificate
To submit an application to the App Store, you need to create an iOS provisioning profile for distribution. To create such a provisioning profile, you first need to create a distribution certificate. The process for creating a distribution certificate is very similar to creating a development certificate. If you have tested your application on a physical device, then you are probably already familiar with the creation of a development certificate.
If you need to refresh your memory, I suggest reading Apple’s detailed guide about signing certificates and provisioning profiles. The process is not difficult once you understand how the various pieces of the puzzle fit together.
Step 3: Provisioning Profile
Once you’ve created an App ID and a distribution certificate, you can create an iOS provisioning profile for distributing your application through the App Store. Keep in mind that you cannot use the same provisioning profile that you use for ad hoc distribution. You need to create a separate provisioning profile for App Store distribution. If you use a wildcard App ID for your project, then you can use the same provisioning profile for multiple applications.
Step 4: Build Settings
With the App ID, distribution certificate, and provisioning profile in place, it is time to configure your target’s build settings in Xcode. This means selecting the target from the list of targets in Xcode’s Project Navigator, opening the Build Settings tab at the top, and updating the settings in the Code Signingsection to match the distribution provisioning profile you created earlier. Newly added provisioning profiles are sometimes not immediately visible in the Code Signing section of the build settings. Quitting and relaunching Xcode remedies this issue.
Figure 2: Configuring the Target’s Build Settings
Even though the code signing process is fairly simple once you understand it, it is something that trips up a lot of developers. I don’t know a single Cocoa developer who hasn’t run into code signing issues at some point in their career. Once you’ve taken this hurdle, the rest of the submission process is fairly easy.
Step 5: Deployment Target
It is useful to write a few words about your application’s deployment target. Each target in an Xcode project, has a deployment target, which indicates the minimum version of the operating system that the application can run on. It is up to you to set the deployment target, but keep in mind that modifying the deployment target is not something you can do without consequences once your application is in the App Store. If you increase the deployment target for an update of your application, then users who already purchased your application but don’t meet the new deployment target, cannot run the update. It gets really problematic when a user downloads an update through iTunes (not the device), replacing the previous version on their computer, and then discovers that the new update doesn’t run on their device.
I have two very simple tips with regards to your application’s deployment target. (1) Be very careful when you decide to increase the deployment target of an existing application. Mention this in the application’s release notes of the updates that precede the change and again in the update that uses the new deployment target. If your warn your customers well in advance, you have done all you can to prevent potential problems. (2) For new applications, I almost always set the deployment target to the last major release, iOS 6 at the time of writing. Because of the incredible adoption rate of new iOS releases, there is no harm in doing this. Some people think that they miss out on a large chunk of the market, but that is not true. Take the release of iOS 6 as an example. One month after the release of iOS 6, more than 60% of iOS devices had upgraded to the new version of iOS. Unfortunately, the same isn’t true for Android.
3. Assets
Step 1: Icons
You probably know that an application icon is a vital component of every iOS application, but you need to make sure that your application ships with the correct sizes of the artwork. Take a look at the list below for an overview.
iTunes Artwork: 1024px x 1024px (required)
iPad/iPad Mini: 72px x 72px and 114px x 114px (required)
iPhone/iPod Touch: 57px x 57px and 114px x 114px (required)
Search Icon: 29px x 29px and 58px x 58px (optional)
Settings Application: 50px x 50px and 100px x 100px (optional)
It goes without saying that you don’t need to include an application icon for the iPad/iPad Mini device family if your application only targets the iPhone/iPod Touch device family, and vice versa.
Step 2: Screenshots
Each application can have up to five screenshots and you must provide at least one. If you are developing a universal application, then you need to provide separate screenshots for iPhone/iPod Touch and iPad/iPad Mini. In addition, you can optionally include separate screenshots for the 3.5″ and the 4″ screen sizes of the iPhone/iPod Touch. This is quite a bit of work and you want to make sure that the screenshots show your application from its best side. Shiny Development sells a Mac application, Status Magic that helps you get the status bar in your screenshots right. Status Magic will save you quite a bit of time.
It is important to spend some time thinking about the screenshots. Your application’s screenshots are often the only thing that a customer can use to decide whether she purchases or downloads your application or not. What a lot of developers don’t know is that the screenshots don’t have to be actual screenshots. The hard rule is that the size of each screenshot needs to be that of the screen size of the target device. Many companies are creative with this rule. Take a look at the screenshots of Where’s My Water?, for example. By using this strategy, screenshots can be much more attractive and compelling.
Step 3: Metadata
Before you submit your application, it is a good idea to have your application’s metadata at hand. This includes (1) your application’s name, (2) the version number, (3) the primary (and an optional secondary) category, (4) a concise description, (5) keywords, and (6) a support URL. If you are submitting an update, then you can also provide information for the What’s new in this Version section.
Does your application require users to sign in? Then you also need to provide Apple with a test or demo account to make sure that the review team can immediately sign in and use your application without first having to sign up for an account.
4. Submission Preparation
The submission process has become much easier since the release of Xcode 4. You can now validate and submit an application using Xcode, for example. First, however, you need to create your application in iTunes Connect.
Visit iTunes Connect, sign in with your iOS developer account, and click Manage Your Apps on the right. Click the Add New App in the top left, select iOS App, and fill out the form.
Figure 3: Visit iTunes Connect to Get Started
Step 1: Basic Information
The App Name, which needs to be unique, is the name of your application as it will appear in the App Store. This can be different than the name that is displayed below your application icon on the home screen, but it is recommended to choose the same name. The SKU Number is a unique string that identifies your application. I usually use the application’s bundle identifier. The last piece of information is the Bundle ID of your application. This means selecting the (wildcard or explicit) App ID that you created earlier from the drop down menu.
Figure 4: Specifying Name, SKU Number, and Bundle ID
Step 2: Price and Availability
In the next step, you specify your application’s price and availability. Apple works with price tiers so that you don’t have to specify a price for each country that Apple operates in. You can also specify in which stores your application should – or shouldn’t – be available. The information that you enter in this step can be modified once your application is live in the App Store. In other words, you can change the price and availability of an application without having to submit an update.
Figure 5: Specifying Price and Availability
Step 3: Metadata
We’ve already covered the application’s metadata. The only aspect that I haven’t talked about yet is your application’s rating. Based on your application’s content and functionality, it is given a rating. This rating is not only useful for telling users about your application’s content and features, the rating is also used by the operating system for the parental controls features.
It is strongly recommended that you don’t try to outsmart the rating system. Apple is well aware of this and will reject your application if it doesn’t agree with the rating that you have set.
Figure 6: Entering Your Application’s Metadata and Assigning a Rating
Step 4: Ready to Upload Binary
Once your application’s metadata is submitted, you will be presented with a summary of your application. Under Versions, you should see the version that you submitted a moment ago. Click the View Detailsbutton and click the Ready to Upload Binary button in the top right. You are then asked one or more questions regarding your application and, if all went well, you should see a message telling you that you are now ready to upload your application binary. The status of your application has changed to Waiting for Upload.
Figure 7: Your Application’s Summary
5. Uploading Binary
To submit your application, you need to create an archive of your application. You can only create an archive by building your application on a physical device. If you select the iOS Simulator in the active scheme, you will notice that the Archive option in Xcode’s Product menu is grayed out. Connect an iOS device to your Mac, select it in the active scheme, and select Archive from Xcode’s Product menu.
Figure 8: Archiving Your Application using Xcode
If all went well, you should now have an archive and Xcode’s Organizer should automatically open and show you the archive you just created. Select the archive from the list and click the Distribute… button on the right. From the options you are presented with, select Submit to the iOS App Store. After entering your iOS developer account credentials and selecting the Application and Code Signing Identity, the application binary is uploaded to Apple’s servers. During this process, your application is also validated. If an error occurs during the validation, the submission process will fail. The validation process is very useful as it will tell you if there is something wrong with your application binary that would otherwise result in a rejection by the App Store review team.
Figure 9: Archiving Your Application using Xcode
Figure 10: Submit Your Application to the iOS App Store
Figure 11: Enter Your iOS Developer Account Credentials
Figure 12: Select Application and Code Signing Identity
Figure 13: An Error is Shown if Validation Fails
6. Waiting
If the submission process went without problems, your application’s status will change to Waiting for Review. It takes several days for Apple to review your application and the time it takes, tends to fluctuate over time. To get an idea of the average review times of iOS and Mac applications, I recommend visiting the website of Shiny Development (Dave Verwer). This will give you a good indication of how long the review process will take.
Conclusion
The submission process is quite lengthy for a new application, but submitting an update to the App Store is much less cumbersome. Keep in mind that the submission process is much more involving if your application is localized in various languages as your application’s metadata needs to be localized as well. However, localizing your application is well worth the effort as it often results in higher sales and positive customer feedback .